1. Open the client.
2a. Select 'Tools' ==> 'Accounts' (Outlook Express)
2b. Select 'Tools' ==> 'Services' (Outlook)
3. Select 'Add' ==> 'Mail..' (if already setup for POP3 skip to step 5)
4. Follow the prompts for your Name and E-mail address, select POP3, the incoming and outgoing server is 'mail.thehippo.net', fill in your username and password in the appropriate boxes, be sure to UNCHECK 'Log on Using Secure Password Authentication' and check 'My Server Requires Authentication'. Click 'Next' until complete.
5. Now we need to select the new mail account, click 'Properties', select the 'Advanced' tab, and select both of the 'This server requires a secure connection' boxes next to SMTP and POP3. Make Sure that the new SMTP port is set to '465' and that the POP3 port is set to '995'.
Now you should be able to send/recieve mail via POP3.
1. Same as above.
2. Same as above.
3. Same as above, though you will have to setup a new account. No skipping 4 here.
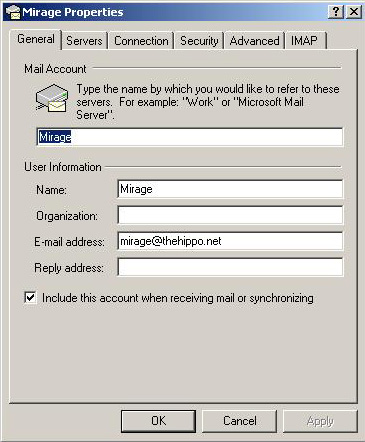
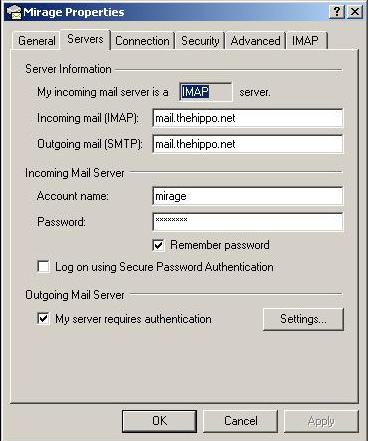
4.Follow the prompts for your Name and E-mail address, select IMAP, the incoming and outgoing server is 'mail.thehippo.net', fill in your username and password in the appropriate boxes, be sure to UNCHECK 'Log on Using Secure Password Authentication' and check 'My Server Requires Authentication'. Click 'Next' until complete.
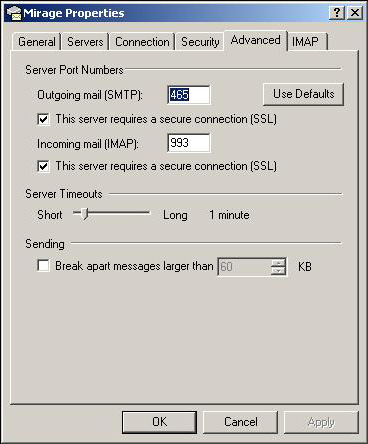
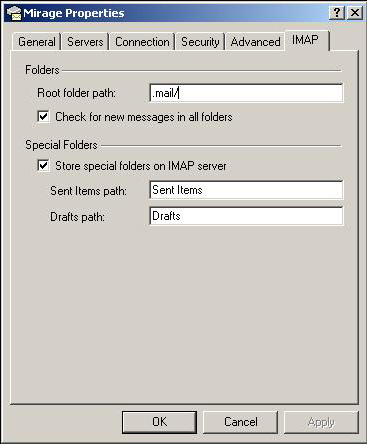
5. Now we need to select the new mail account, click 'Properties', select the 'Advanced' tab, and select both of the 'This server requires a secure connection' boxes next to SMTP and IMAP. Make Sure that the new SMTP port is set to '465' and that the POP3 port is set to '993'. Select the 'IMAP' tab and in the box next to 'Root folder path' type '.mail/' and hit 'OK'.
| |
| |